Tuesday, October 28, 2008

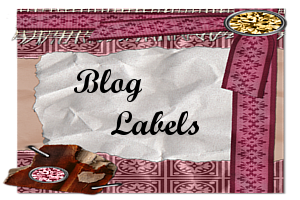
Blog Tabs


Hey y'all...I learned how to make these cute tabs to use as labels on your blogs... I made these at 300 pixels by 200 pixels with a transparent background. Copy and paste your elements just the way you want them, now add Text in the color you like ... Save as .png ...Upload to photobucket to get the codes you need to add to your blog... Wooo Hooo !!! Tabs for everybody....


Happy Gimp Scrappin'.....

UPDATE; I found that I missed a step and that is why I have a white background on the tab...
Here is what I did...When I added new layers to this tab, I made them a transparent layer...Go to layer ~ Transparency ~ Add to Selection...you will see 'marching ants' around the element you just added.. Remember that every layer must be transparent..Then save as .png...
Hope this helps...
Cat..
Saturday, October 25, 2008

Artist Trading Cards

Make these at 750 pixels by 1050 pixels. ( the atc in the center was made at 2 1/2 by 3 1/2 inches, and look at the different size it came out as ) Fill them up with stuff all about you or the person you are making one for...Save it as .jpg on your computer...Print them up (cardstock..hmmm..) and trade them with your friends and family...This is not a new idea...People (artists) have been making these cards for a century or longer and some are now collector items...So, wanna trade?

Happy Gimp scrappin'....

Monday, October 20, 2008

Blinkies...


I learned how to make blinkies...woo hoo...Blinkies for everybody !!! For this one I used 4 pictures.. Open up Gimp and make a new file.(for this pic blinkie, I made it 3inchs by 3 inches) The ones we see on blog pages are 300 pixels by 100 pixels..Open up what you want to use in your blinkie. Once you have it just the way you want it, in your layers window click on one layer at a time and duplicate it 6 times ( the more duplicates you have, the longer it 'blinks' ) Now in your layers window you will have pasted layers and the one on the very bottom is a background layer.Right Click on the pasted layer above the background layer, a new window will open, click on merge down, the 2 layers will become one layer. (if you miss this step, your blinkie will have a blank white layer in it. not pretty..ask me how i know this.lol.) Now in your blinkie window, click on filter, then move your curser on animation, click on Optimize for GIF...a new window pops up with your blinkie in it, click on filter, go to animation, click on playback..A new window opens up, click on play.. This is what your blinkie looks like..close this window, you now have 2 windows with blinkies in them, notice one has all the dup layers in it ( top of window says 14 layers) the other window has 3 layers in it, in this window click on file, save as, give your blinkie a name that ends with .gif..,a new window will pop up, Export File, click on save as animation, click export. then save to your computer.. I then uploaded my blinkie to photobucket and got a html code to post it on my blog... Hope this helps with making your own blinkies..I can hardly wait to see what y'all make.. So get busy and send me your blinkies.....

Happy Gimp scrappin'...
Cat

Friday, October 17, 2008

Picture with a mask


Isn't this cool? This is a picture I took of hydrangea blooms. I took it over to Gimp and used a mask with it. Click here for the tutorial ....'How to use photo masks in Gimp'...by Mo...


Happy Gimp Scrappin'...

Thursday, October 16, 2008

I made my very own siggy...


With the help of the fabulous ladies at ScrapGirls, I have learned how to make my very own siggy. A signature that members can use in the message boards. For practice I think I will make one for everybody I know that has a blog. A music lover, a starbucks lover, a horse lover....Oh this is just what I was looking for. Something small that can be posted all over the web....as some very dear friends are using dialup... This is made at 250 pixels by 250 pixels with a transparent background. Add embellies and text then save as .png........sounds easy huh? It is.....

Happy Gimp scrappin'...

Tuesday, October 14, 2008

Look what I did with this picture...


This is a picture of the house our son and his little family just moved into..The idea here was to make a card to send out to family and friends to inform them of the new address.. Now I have the front of the card made, I have to decide if I want to have a card that folds, with this picture on the front and white on the back, or just have this front be all there is to it, and write on the back of it , then into the envelope...hmmm...I think I like having the inside back of the card to write on..
This was alot of fun to play around with using the Gimp and a tutorial I found on youtube. ( Look for it posted at the top of this page.)..This one really got my creative juices flowing and thinking about making all kinds of cards, birthdays and oh yeah, Christmas...I should get started on that right away to have them ready to sent out...lol...must scheldule some photo shoots with the granbabies.. And learn more about the Gimp...
Happy scrappin...

Tuesday, October 7, 2008

Blog Headers


These are just fun to do...make them in Gimp, upload them to photobucket, then use the code to pop them on your blog as headers...I make these at 6 inches wide by 4 inches high...The Danny & Me header will have to be done over, as the pic is all distorted..At the time I made it, I did not know how to enhance the picture...lol...but a few tutorials later I now know how to .. filter-sharpen-enhance..


Monday, October 6, 2008


Welcome to PaisleycatScraps... Just a little blog where I can share the scrapbook pages I make and the scrap stuff I am learning to do using the GimpShop... I have made a few simple pages and a few blog headers .. These are soo much fun to make... Don't just take my word for it, come on, jump in and start making your very own...


pages