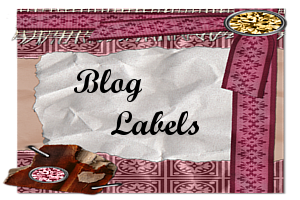
Okay, I finally learned how to do this.. All by myself, lol .. I'm just giddy about all the designs I can make.. First of all you will need some designer resources.. I purchased these lovely label masks from Delicious Scraps.. Soo, open up ur Gimp, make a new file at 300px by 225px, and make ur background transparent.. Open up the paper you want to use, I like to use the Rectangle Select Tool to cut out a small part of the paper, copy and paste it into the file. Now copy and paste the label mask into the file.. resize it.. Now click on the mask layer in your layers window, it should be highlighted, now right click on it, and choose 'alfa to selection'.. You will see 'marching ants' around the black mask.. Now click on the paper layer in your layers window..Come over and click on the paper layer in your new file window (working window), click on edit, click copy, click edit again, now click paste. Anchor your floating layer in the layers window, you should see the outlines of the mask in your paper.. Now in the layers window, click on the eye beside your paper layer.. Wowser, do you see your new label?? Now all you have to do is Save it.. I like to 'Save as' and give it a name.. This one is 'Old Rose layered label'.. I hope this opens up a whole new world for your scrapping pleasure..
Enjoy your day..
Sunday, February 28, 2010
Friday, September 25, 2009
I'm lovin' PhotoScape...
Here's a photo I cropped and then put in a frame at PhotoScape..(This is my nephew Chance.. He's giving me a driving lesson on his GoCart.. What fun!! Chance, you're the BEST..) Love the tape on the corners.. Soo many frames to choose from. And you can add just about any tint you can think of, PhotoScape has it.. The program is a little intimidating at first, just use the undo button and play around with it.. Have fun dressing up your blog photos.. .. lol .. I know I will..
Wednesday, September 23, 2009
PhotoScape photo editor ..
Hey ya'll, here's a photo I took this summer while visiting with my Dear Mama.. I just found out about this awesome photo editor called PhotoScape.. So I uploaded this pic and got started editing.. lol .. This is the scratched effect.. I quite like it.. And it was very easy to do.. Ok, It was a little intimidating at first, but there are some really cool how to vidoes to help us out on the site.. So, what are ya waiting for? Get on over to PhotoScape and check it out.. And be sure to blog about it so we can all see each others creations..
Just have fun with it.. Happy bloggin'..
Tuesday, February 24, 2009
Make ur own sidebar labels...
Would you like to dress up ur blog with sidebar labels? Well, I hope I have just made it a bit easier for ya'll to do just that.. To use these labels, just right click on the one you like and save it to ur computer..Then take it to photoshopexpress.com and add ur text to it..Or if ya'll would like to make ur very own sidebar labels, here are a few tips I learned along the way...Start off with a new file at 220 pixels wide by 150 pixels high..and give it a transparent background..Now find the digi kit on ur computer with the label you want to use..Copy and paste it in the new file..Scale it to size.. enhance it 51 %..add a shadow to it..Now click on each layer in ur layers window, one at a time and the layer turns blue, now right click, click on layer, transparency, add to selection..Do this step with each and every layer to get full transparency ( or you will have a white background, not pretty..) Now you are ready to save it as a .png ..(this is a must...Save as .png) To use it, upload to ur favorite photo sharing site to get the html code.. I like tinypic.com...You can also use photoshopepress.com or photobucket.com ... Enjoy ur labels...
Thursday, January 8, 2009
Frame template for blog pictures...
Have ya seen ppl post their pics with a frame and wondered 'How did they do that'? Well I just learned how to do that and I want to share it with ya'll.. Ready? Fire up ur Gimp.. Open up a new file with transparent background..Cowgirl's pic is 350 x 350 pixels. Make ur file the size you want ur pic to be..Now open the frame you want to use , copy and paste it into the new file.. Make sure the frame fills the edges of the file..I like to sharpen it up a bit. Now make this layer transparent by clicking on Layer, Transparency, Add to Selection..Rename it...Now save it as a .png on ur computer..(I named mine blog frame.png ) You have just made a template..Now when you want to use it, go to Gimp, open it up, copy and paste it, add ur picture behind the frame, then you can add some text or not..Save it, rename it as a .png, to ur computer...Now you have it all ready to post on ur blog...Easy, yes? Hope so.. Let me know if this worked for you too..I'm excited to see ur frames..and ur new blog posts..hehe... Happy Gimp Scrappin'...
Tuesday, October 28, 2008
Blog Tabs

Hey y'all...I learned how to make these cute tabs to use as labels on your blogs... I made these at 300 pixels by 200 pixels with a transparent background. Copy and paste your elements just the way you want them, now add Text in the color you like ... Save as .png ...Upload to photobucket to get the codes you need to add to your blog... Wooo Hooo !!! Tabs for everybody....
Happy Gimp Scrappin'.....
UPDATE; I found that I missed a step and that is why I have a white background on the tab...
Here is what I did...When I added new layers to this tab, I made them a transparent layer...Go to layer ~ Transparency ~ Add to Selection...you will see 'marching ants' around the element you just added.. Remember that every layer must be transparent..Then save as .png...
Hope this helps...
Cat..
Saturday, October 25, 2008
Artist Trading Cards
Make these at 750 pixels by 1050 pixels. ( the atc in the center was made at 2 1/2 by 3 1/2 inches, and look at the different size it came out as ) Fill them up with stuff all about you or the person you are making one for...Save it as .jpg on your computer...Print them up (cardstock..hmmm..) and trade them with your friends and family...This is not a new idea...People (artists) have been making these cards for a century or longer and some are now collector items...So, wanna trade?
Happy Gimp scrappin'....
Happy Gimp scrappin'....
Subscribe to:
Comments (Atom)


